Cycling transcends its role as a delightful and healthful mode of transportation; it emerges as a formidable vehicle for physical exercise. Nevertheless, the paramount concern remains safety, a non-negotiable prerogative whether one traverses the urban streets or ventures into the rugged trails of nature’s embrace. Among the indispensable safety accouterments for any avid cyclist resides the judiciously adjusted bicycle helmet. Within the confines of this comprehensive manual, our focal point converges on an elemental facet of helmet safety: the meticulous fine-tuning of your bicycle helmet’s straps.
Why Properly Adjusting Helmet Straps Matters
Before we dive into the step-by-step process of adjusting your helmet straps, let’s understand why it’s so crucial.
- Protection: A well-fitted helmet is your first line of defense in case of a fall or collision. It helps absorb and distribute the impact force, reducing the risk of head injuries;
- Stability: Properly adjusted straps ensure that your helmet stays securely on your head, even during sudden movements or impacts. This stability is essential for your safety while cycling;
- Comfort: An accurately adjusted helmet is more comfortable to wear for extended periods. This can make your rides more enjoyable and encourage you to wear your helmet consistently;
- Visibility: A securely fastened helmet won’t obstruct your vision, allowing you to maintain better awareness of your surroundings;
- Now, let’s get into the nitty-gritty of adjusting your bike helmet straps.
Step-by-Step Guide to Adjusting Helmet Straps
1. Select the Right Helmet
Before you even think about adjusting the straps, it’s crucial to ensure you have the right helmet size for your head. Helmets come in various sizes to accommodate different head shapes. Follow these steps to determine your helmet size:
| Step | Description |
|---|---|
| Measure Your Head | Use a flexible tape measure to determine your head’s circumference. |
| Choose the Right Size | Refer to the helmet manufacturer’s size chart to select the appropriate size based on your measurement. |
Your helmet should fit snugly but not be excessively tight. This initial step sets the foundation for a safe and comfortable ride.
2. Understand the Helmet Parts
A standard bike helmet consists of several key components that play a vital role in protecting your head:
| Helmet Part | Function |
|---|---|
| Shell | The outer layer designed to absorb and distribute impact forces. |
| Liner | A cushioning layer inside the shell. |
| Straps | These secure the helmet to your head. |
| Buckle | The fastener that connects the chin straps. |
| Adjustment Dial | Some helmets have a dial to fine-tune the fit. |
Understanding these parts will help you make precise adjustments.
3. Secure the Helmet
Place the helmet on your head so that it sits level and covers your forehead. The front edge should be about one inch above your eyebrows. Make sure the helmet doesn’t tilt backward or forward, as this can affect its protective capabilities.
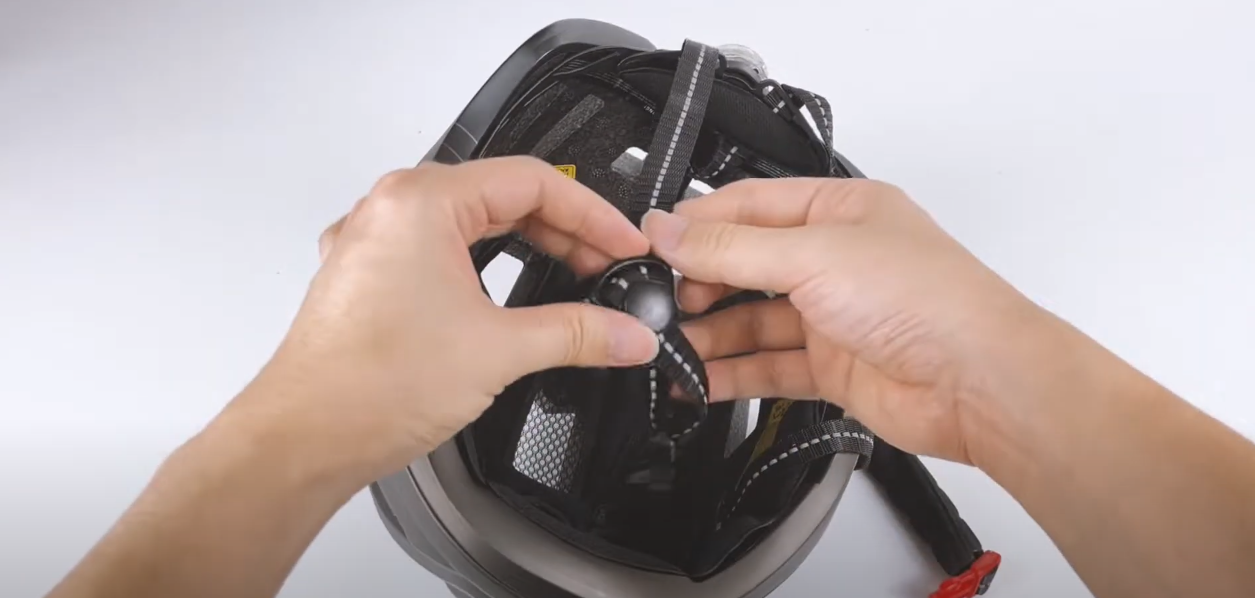
4. Adjust the Side Straps
Properly adjusted side straps are essential for a secure fit. Follow these steps:
- Position the Y-shaped junction of the straps just below your ears;
- Tighten or loosen the straps until they are snug but not overly tight. You should be able to fit only one finger between the strap and your skin.
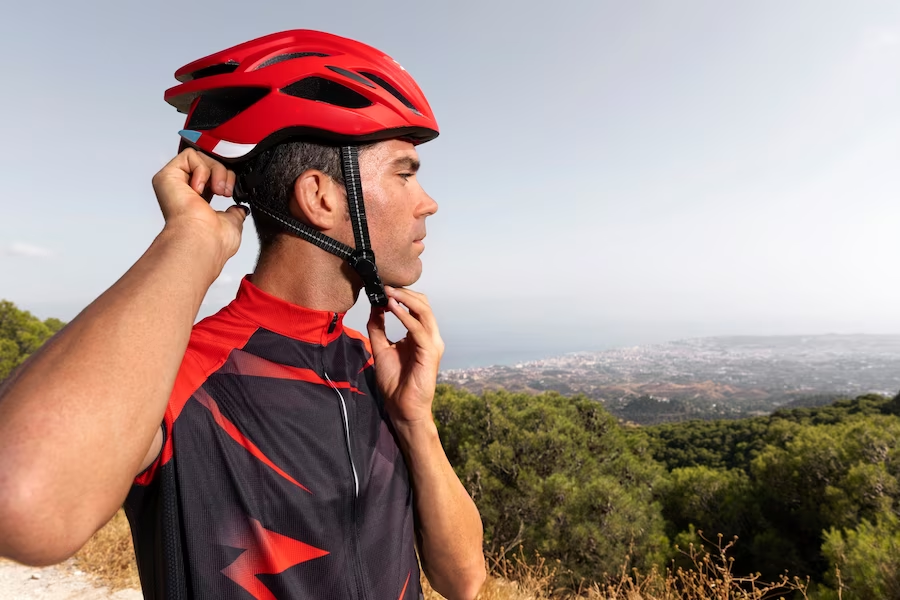
5. Center the Buckle
The buckle should sit comfortably below your chin, ensuring it doesn’t press against your throat. Adjust the length of the chin straps to achieve this.
6. Fine-Tune the Fit
If your helmet has an adjustment dial, use it to fine-tune the fit further. The goal is to achieve a snug and secure fit without any pressure points. If your helmet doesn’t have an adjustment dial, you may need to adjust the straps a bit more to get the perfect fit.
7. Perform the “Push-Pull” Test
To ensure your helmet is securely in place, perform the “push-pull” test:
- Push the front of your helmet upward. It should not move more than an inch;
- Grab the back of the helmet and try to lift it off your head. It should stay firmly in place.
8. Check for Proper Positioning
Verify that the helmet is level on your head and doesn’t shift when you move. It should cover the top of your head and sit low enough to protect your forehead.
9. Trim Excess Straps
If your helmet has long excess straps, trim them to avoid them getting caught in your bike’s components or causing distractions while riding. Be sure to leave enough length for future adjustments.
10. Final Check
Before hitting the road, take one last look in the mirror or ask a friend to confirm that your helmet is properly adjusted and secure. It’s worth the extra effort to ensure your safety.
Conclusion
Properly adjusting the straps of your bicycle helmet is a seemingly uncomplicated yet utterly vital measure in guaranteeing your safety during cycling endeavors. Dedicate the time and effort to meticulously adhere to these instructions, and maintain a vigilant habit of periodically inspecting the snugness of your helmet’s fit. Doing so can undeniably yield a substantial enhancement in your safeguarding while traversing the open road or rugged trails.
FAQ
The chin strap should be snug but not uncomfortably tight. You should be able to fit one finger between the strap and your skin.
It’s not recommended to wear a thick hat under your helmet, as it can affect the fit and safety. Instead, opt for a thin, moisture-wicking skullcap if you need additional head protection in cold weather.
It’s not safe to adjust your helmet while riding. Make sure it’s properly adjusted before you start your ride. If you need to make adjustments, pull over to a safe location.
Regularly check your helmet’s fit, especially if you’ve had any changes in hairstyle or head size. It’s a good practice to check before each ride.
Replace your helmet if it has been involved in a crash, if you see any visible damage, or if it’s more than five years old. Helmets degrade over time and may not provide adequate protection after this period.